CentOS7.5 搭建ElasticSearch6.4.2
[root@test home]# cat /etc/centos-release
CentOS Linux release 7.5.1804 (Core)
1.创建用户
adduser elastic -m -U -p Elastic2018其中 -m 表示创建用户的主目录,在/home/username,-U 表示创建同名的组,-p表示密码
vim /etc/sudoers赋予elastic和root一样的权限
添加
elastic ALL=(ALL) ALL创建目录
mkdir -p /home/tmp/download下载EslaticSearch
wget -P /home/tmp/download/ https://artifacts.elastic.co/downloads/elasticsearch/elasticsearch-6.4.2.tar.gz下载Kibana:
wget -P /home/tmp/download/ https://artifacts.elastic.co/downloads/kibana/kibana-6.4.2-linux-x86_64.tar.gz切换到elastic用户:
su elastic
cd /home/elastic/
tar -zxvf ../tmp/download/elasticsearch-6.4.2.tar.gz -C /home/elastic/
tar -zxf ../tmp/download/kibana-6.4.2-linux-x86_64.tar.gz -C /home/elastic/
配置Elasticsearch
vim ./elasticsearch-6.4.2/config/elasticsearch.yml 添加以下内容:
# 集群名
cluster.name: elasticsearch

# 当前节点名
node.name: node-1

# 数据目录
path.data: /home/elastic/es_data/data

# 日志目录
path.logs: /home/elastic/es_data/logs

# 配置es绑定的ip(这里根据你的ip修改)
network.host: 0.0.0.0

# 设置对外服务的http访问端口
http.port: 9200

# 设置节点间交互的tcp端口,默认是9300。
transport.tcp.port: 9300

# 集群节点列表
#discovery.zen.ping.unicast.hosts: ["118.184.218.184:9300",]

# 节点
discovery.zen.minimum_master_nodes: 1

# 由于当jvm开始swapping时es的效率会降低,所以要保证它不swap,这对节点健康极其重要。实现这一目标的一种方法是将 bootstrap.memory_lock 设置为true。
bootstrap.memory_lock: true
启动es
./elasticsearch-6.4.2/bin/elasticsearch提示内存锁定失败
解决:切换到root用户,编辑limits.conf配置文件, 添加类似如下内容:
sudo vim /etc/security/limits.conf
添加如下内容:
* soft nofile 65536
* hard nofile 131072
* soft nproc 2048
* hard nproc 4096
elastic soft memlock unlimited
elastic hard memlock unlimited- 备注: elastic 代表Linux用户名称,当然你也可以直接用*代替,表示给本机所有用户配置,然后保存、退出、重新登录才可生效
提示 Java HotSpot(TM) 64-Bit Server VM warning: INFO: os::commit_memory(0x0000000085330000, 2060255232, 0) failed; error=’Cannot allocate memory’ (errno=12)
vi ./elasticsearch-6.4.2/config/jvm.options
-Xms512m
-Xmx512m
提示 max virtual memory areas vm.max_map_count [65530] is too low, increase to at least [262144]
vim /etc/sysctl.conf
加入
vm.max_map_count=655360
使其生效
sysctl -p
再次启动,成功了(后台启动加 -d):
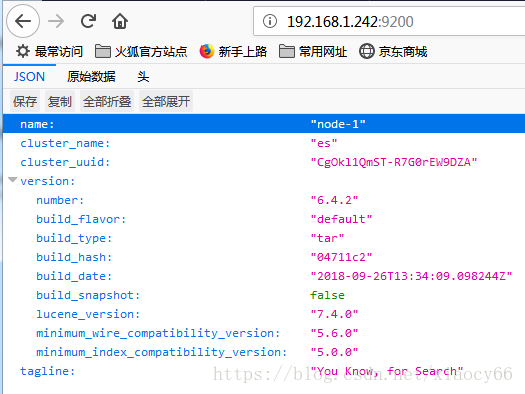
./elasticsearch-6.4.2/bin/elasticsearch我们在浏览器打开部署成功的es: http://118.184.218.184:9200,结果如下图所示:
配置Kibana
vi ./kibana-6.4.2-linux-x86_64/config/kibana.yml
这个只要简单配置一下就能用了,我们修改config目录的kibana.yml文件设置elasticsearch的url地址即可:
server.port: 5601
server.host: "0.0.0.0"
# The URL of the Elasticsearch instance to use for all your queries.
elasticsearch.url: "http://118.184.218.184:9200"
启动kibana(后台启动加 -d)
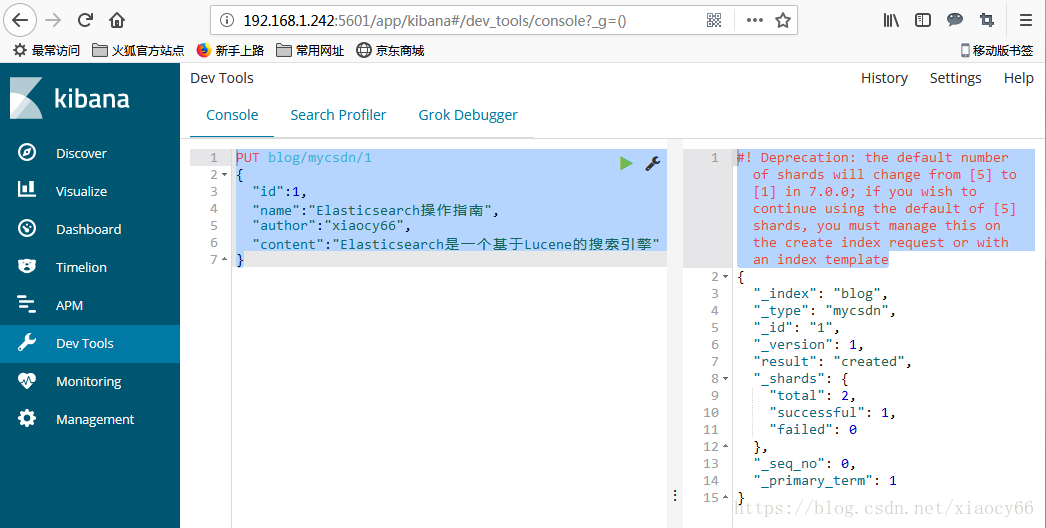
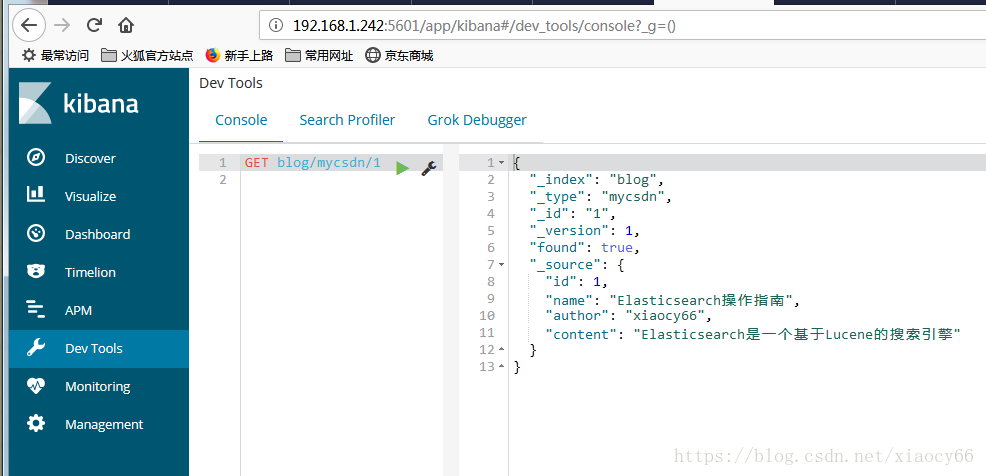
./kibana-6.4.2-linux-x86_64/bin/kibana我们试着通过kibana往里面加数据:
PUT blog/mycsdn/1
{
  "id":1,
  "name":"Elasticsearch操作指南",
  "author":"xiaocy66",
  "content":"Elasticsearch是一个基于Lucene的搜索引擎"
}