安装helm
参考:kubernetes安装helm和Monocular界面
安装kubernetes
参考:kubernetes-1.14.2集群安装和dashbaord面板
开启Sidecar自动注入
如果集群使用的是自动 Sidecar 注入,为 default 命名空间打上标签 istio-injection=enabled。
kubectl label namespace default istio-injection=enabled安装istio
wget https://github.com/istio/istio/releases/download/1.2.0/istio-1.2.0-linux.tar.gz
tar -zxvf istio-1.2.0-linux.tar.gz
vi ~/.bash_profile
export PATH="$PATH:/root/istio-1.2.0/bin"
source ~/.bash_profile
helm安装istio
cd istio-1.2.0
这个过程很慢 需要耐心等待 可以使用kubectl describe pod xxx 查看详细信息
helm install install/kubernetes/helm/istio-init --name istio-init --namespace istio-system
helm install install/kubernetes/helm/istio --name istio --namespace istio-system --set tracing.enabled=true --set grafana.enabled=true --set tracing.jaeger.ingress.enabled=true --set tracing.ingress.enabled=true --set kiali.ingress.enabled=true
kubectl get svc -n istio-system
kubectl get pods -n istio-system
显示成这样说明部署成功了
NAME                                      READY   STATUS      RESTARTS   AGE
grafana-7b9f5d484f-mf28j                  1/1     Running     0          11h
istio-citadel-848f4c8489-s4bm9            1/1     Running     0          11h
istio-cleanup-secrets-1.1.1-4zd5w         0/1     Completed   0          12h
istio-egressgateway-7469db8c68-jlr9b      1/1     Running     0          12h
istio-galley-86bcf86779-858jv             1/1     Running     0          12h
istio-grafana-post-install-1.1.1-t7qqg    0/1     Completed   0          12h
istio-ingressgateway-56bbdd69bf-j7swp     1/1     Running     0          12h
istio-pilot-77b99c499-xxhfk               2/2     Running     1          12h
istio-policy-85f58d8775-wd8wm             2/2     Running     6          12h
istio-security-post-install-1.1.1-nfhb8   0/1     Completed   0          12h
istio-sidecar-injector-5464f674c4-rcvpk   1/1     Running     0          12h
istio-telemetry-9b844886f-h9rzd           2/2     Running     6          12h
istio-tracing-7f5d8c5d98-s72nv            1/1     Running     0          12h
kiali-589d55b4db-vljzq                    1/1     Running     0          12h
prometheus-878999949-qntkc                1/1     Running     0          12h
卸载istio
如果您使用Helm和Tiller安装了Istio,请使用以下命令卸载:
helm delete --purge istio
helm delete --purge istio-init
template安装的话
helm template install/kubernetes/helm/istio --name istio --namespace istio-system | kubectl delete -f -
kubectl delete namespace istio-system
删除CRD会永久删除您对Istio所做的任何配置更改
kubectl delete -f install/kubernetes/helm/istio-init/files部署测试应用
vi nginx-daemonset.yaml
保持格式的
apiVersion: extensions/v1beta1
kind: DaemonSet
metadata:
  name: qf-test-nginx
spec:
  template:
    metadata:
      labels:
        app: nginx
    spec:
      containers:
      - name: nginx
        image: qingfenglian/test_nginx
        ports:
        - containerPort: 80
---
apiVersion: v1
kind: Service
metadata:
  name: qf-test-nginx
  namespace: default
spec:
  type: NodePort
  selector:
    app: nginx
  ports:
  - port: 80
    targetPort: 80
    name: http
保持格式的
部署
kubectl apply -f nginx-daemonset.yaml用上面的yaml文件部署成功后看一下 daemonset, pod,svc,node 信息
kubectl get daemonset,pod,svc,node -o wide
NAME                                 DESIRED   CURRENT   READY   UP-TO-DATE   AVAILABLE   NODE SELECTOR   AGE   CONTAINERS   IMAGES                    SELECTOR
daemonset.extensions/qf-test-nginx   1         1         1       1            1           <none>          16h   nginx        qingfenglian/test_nginx   app=nginx

NAME                      READY   STATUS    RESTARTS   AGE   IP            NODE       NOMINATED NODE   READINESS GATES
pod/qf-test-nginx-45k8x     1/1     Running   0          16h   10.2440.244.24424444440.244.244244444  k8s-master   <none>           <97vc   1/1     Running   0          16h   10.244.10.4   k8s-node     <none>           <none>

NAME                    TYPE        CLUSTER-IP     EXTERNAL-IP   PORT(S)        AGE     SELECTOR
service/kubernetes      ClusterIP   10.96.0.1      <none>        443/TCP        2d18h   <none>
service/qf-test-nginx   NodePort    10.98.49.158   <none>        80:31412/TCP   16h     app=nginx

NAME              STATUS     ROLES    AGE     VERSION   INTERNAL-IP   EXTERNAL-IP   OS-IMAGE                KERNEL-VERSION          CONTAINER-RUNTIME
node/k8s-master   Ready      master   2d18h   v1.14.0   10.211.55.6   <none>        CentOS Linux 7 (Core)   3.10.0-957.el7.x86_64   docker://18.6.1
node/k8s-node     NotReady   <none>   2d15h   v1.14.0   10.211.55.7   <none>        CentOS Linux 7 (Core)   3.10.0-957.el7.x86_64   docker://18.6.1
创建gateway
vi qingfeng-deve-gateway.yaml
apiVersion: networking.istio.io/v1alpha3
kind: Gateway
metadata:
  name: qingfeng-deve
spec:
  selector:
    istio: ingressgateway # 使用 istio 默认的 ingress gateway
  servers:
  - port:
      number: 80
      name: http
      protocol: HTTP
    hosts:
    - "*"
部署
kubectl create -f <(istioctl kube-inject -f qingfeng-deve-gateway.yaml)查看(这里gateway名字叫qingfeng-deve)
kubectl get gateway部署测试应用
创建virtualservice
vi nginx-virutalservice.yaml

apiVersion: networking.istio.io/v1alpha3
kind: VirtualService
metadata:
  name: vs-nginx
spec:
  hosts:
  - "nginx.local.com"
  gateways:
  - qingfeng-deve
  http:
  - match:
    - uri:
        prefix: /
    route:
    - destination:
        host: qf-test-nginx

kubectl create -f <(istioctl kube-inject -f nginx-virutalservice.yaml)
修改 istio-ingressgateway
kubectl -n istio-system edit deployment istio-ingressgateway找到下面内容,并做修改
将 80 端口和 443 端口配置为 hostPort 模式,
等待几秒让 istio-ingressgateway 重新调度
image: docker.io/istio/proxyv2:1.1.1
        imagePullPolicy: IfNotPresent
        name: istio-proxy
        ports:
        - containerPort: 80
          hostPort: 80                ------------######## 这里增加这一行
          protocol: TCP
        - containerPort: 443
          hostPort: 443          ------------######## 这里增加一行
          protocol: TCP
        - containerPort: 31400
          protocol: TCP
        - containerPort: 15029
          protocol: TCP
        - containerPort: 15030
          protocol: TCP
        - containerPort: 15031
          protocol: TCP
        - containerPort: 15032
          protocol: TCP
        - containerPort: 15443
          protocol: TCP
        - containerPort: 15020
          protocol: TCP
        - containerPort: 15090
          name: http-envoy-prom
          protocol: TCP
验证结果
host绑定:由于我的域名是 nginx.local.com 没有域名解析,所以需要在host里面添加一条记录
绑定host之后通过浏览器访问 nginx.local.com 查看返回信息
部署kiali
在istio命名空间 istio-system 里面创建一个secret 作为kiali认证凭据
设置用户名和密码为admin
USERNAME=$(echo -n 'admin' | base64)
PASSPHRASE=$(echo -n 'admin' | base64)
NAMESPACE=istio-system
kubectl create namespace $NAMESPACE
cat <<EOF | kubectl apply -f -
apiVersion: v1
kind: Secret
metadata:
  name: kiali
  namespace: $NAMESPACE
  labels:
    app: kiali
type: Opaque
data:
  username: $USERNAME
  passphrase: $PASSPHRASE
EOF
设置用户名和密码为admin 格式有问题所以我这里用中文填充了
部署
jaegerURL和grafanaURL可以先执行下面的修改端口 将端口暴露出去配置到下面的jaegerURL和grafanaURL 我建议是单独访问 别配置到kiali呀
保持格式的
helm template \
    --set kiali.enabled=true \
    --set "kiali.dashboard.jaegerURL=http://$(kubectl get svc tracing --namespace istio-system -o jsonpath='{.spec.clusterIP}'):80" \
    --set "kiali.dashboard.grafanaURL=htt://$(kubectl get svc grafana --namespace istio-system -o jsonpath='{.spec.clusterIP}'):3000" \
    install/kubernetes/helm/istio \
    --name istio --namespace istio-system > $HOME/istio.yaml

kubectl apply -f $HOME/istio.yaml
保持格式的
查看
kubectl get pod -n istio-system |grep kiali本地测试
先查看 kiali 对应的service 已经使用的端口 ,然后通过curl 请求 svcIp:prot 访问 返回下面内容表示通了
kubectl get svc -n istio-system kiali -o widecurl 10.111.29.249:20001/kiali/console
部署virtualservice指向kiali 的service
gateway 配置文件我就不贴了(参考上面的gateway配置),这里放一下 virtualservice
vi virtual.yaml
apiVersion: networking.istio.io/v1alpha3
kind: VirtualService
metadata:
  name: kiali
  namespace: default
spec:
  gateways:
  - qingfeng-deve
  hosts:
  - kiali.selfservice.com
  http:
  - match:
    - uri:
        prefix: /
    route:
    - destination:
        host: kiali.istio-system.svc.cluster.local
        port:
          number: 20001
创建
kubectl create -f virtual.yaml配置hosts解析
访问:kiali.selfservice.com
修改prometheus grafana tracing(jaeger)
1 验证prometheus service 已经运行:
kubectl -n istio-system get svc prometheus
NAME         CLUSTER-IP     EXTERNAL-IP   PORT(S)    AGE
prometheus   10.59.241.54   <none>        9090/TCP   2m
2 验证Grafana service运行:
kubectl -n istio-system get svc grafana
NAME      CLUSTER-IP      EXTERNAL-IP   PORT(S)    AGE
grafana   10.59.247.103   <none>        3000/TCP   2m
3 tracing service运行:
kubectl -n istio-system get svc tracing
NAME      TYPE        CLUSTER-IP      EXTERNAL-IP   PORT(S)   AGE
tracing   ClusterIP   10.109.53.237   <none>        80/TCP    19m
3 本地访问grafana(这一步没啥用)
A: 把本地3000端口转发到grafana pod的3000端口:
kubectl -n istio-system port-forward $(kubectl -n istio-system get pod -l app=grafana -o jsonpath='{.items[0].metadata.name}') 3000:3000 &
  B: 在本地的浏览器中访问   http://localhost:3000/dashboard/db/istio-mesh-dashboard

        curl http://localhost:3000/dashboard/db/istio-mesh-dashboard
        <a href="/d/1/istio-mesh-dashboard?">Moved Permanently</a>
        上面的port-forward只能本地访问,不能从外部访问
如何从外部访问service:
默认是clusterIP,需要改成NodePort,暴露一个在30000 ~32767范围内的端口
修改端口为NodePort类型暴露出去 type: NodePort nodePort:ip
tracing 端口为31001
kubectl edit svc tracing -n istio-systemprometheus 端口为31002
kubectl edit svc prometheus -n istio-systemprometheus 端口为31003
kubectl edit svc grafana -n istio-system之后就能单独访问这些界面prometheus grafana tracing(jaeger)
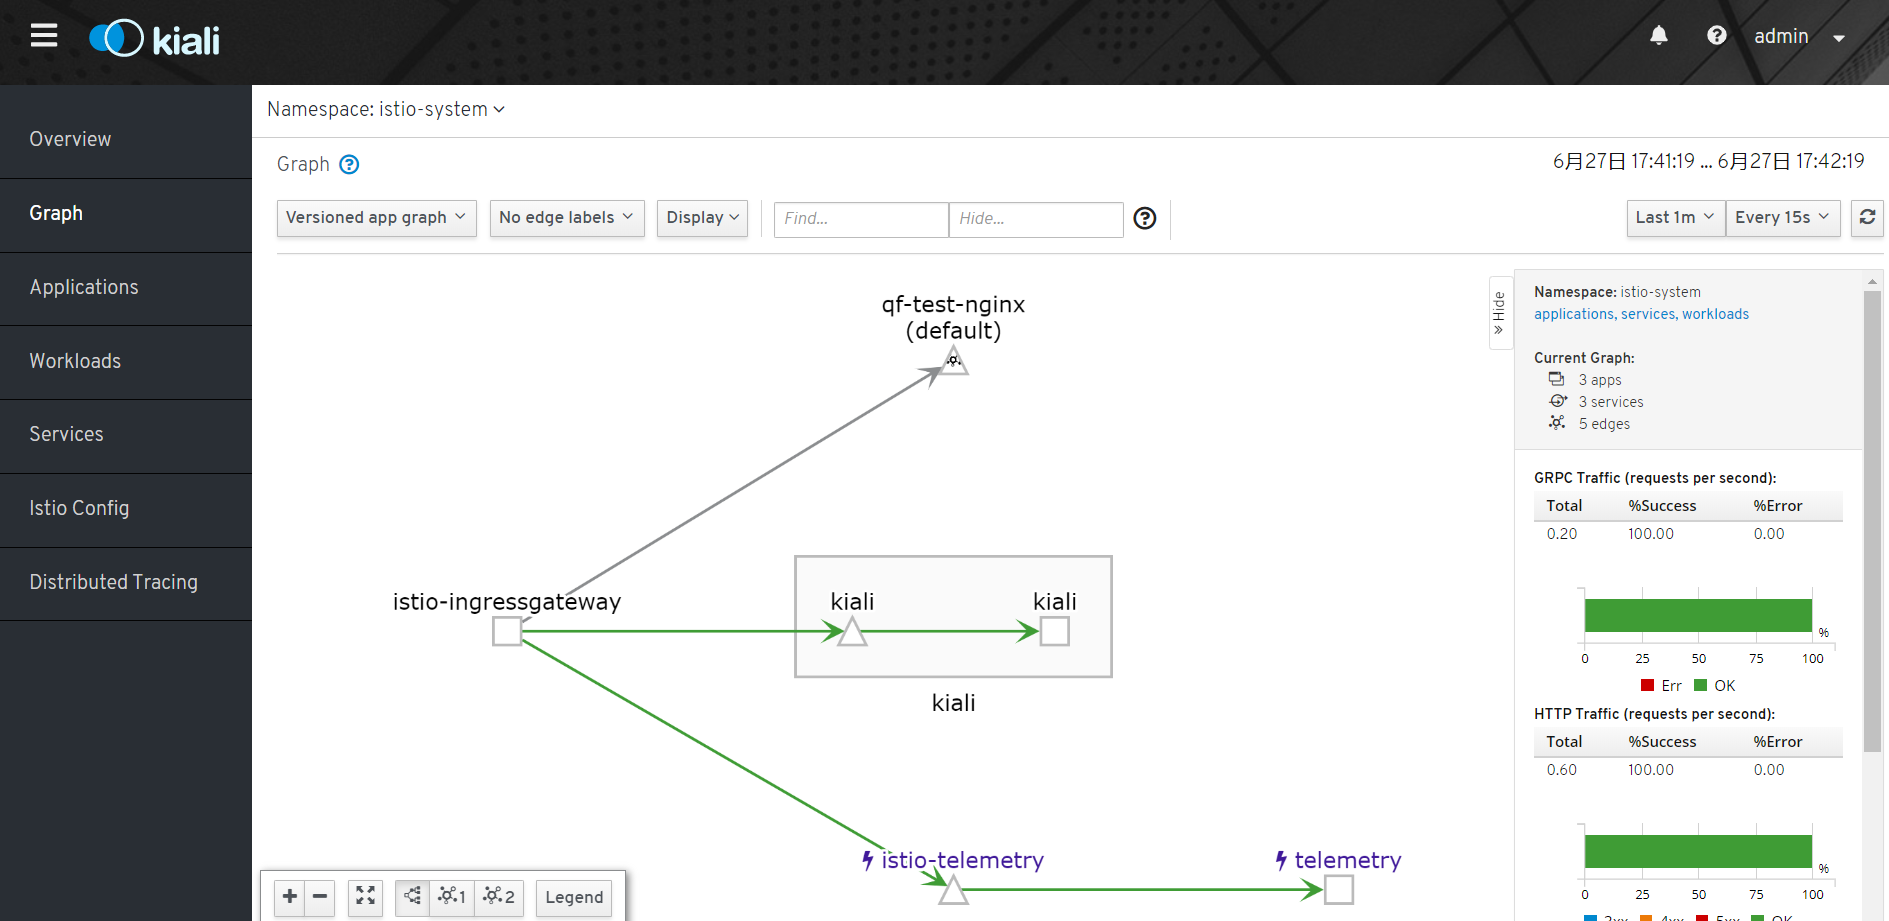
这里放一个kiali的界面吧


