介绍
主要讲解istio的流量控制实现原理 github上test-walle的项目打成了demo:1.0和2.0的版本
用到的yaml文件:https://github.com/ciweigg2/kubernetes-yaml/tree/master/istio-canary
部署Service
vi test-walle-service.yaml
apiVersion: v1
kind: Service
metadata:
  name: test-walle
  labels:
    app: test-walle
    service: test-walle
spec:
  ports:
  - port: 8081
    name: http
  selector:
    app: test-walle
---
apiVersion: v1
kind: ServiceAccount
metadata:
  name: walle-account
部署V1版本的服务
vi test-walle-deploymentV1.yaml
apiVersion: apps/v1
kind: Deployment
metadata:
  name: test-walle-v1
  labels:
    app: test-walle
    version: v1
spec:
  replicas: 1
  selector:
    matchLabels:
      app: test-walle
      version: v1
  template:
    metadata:
      labels:
        app: test-walle
        version: v1
    spec:
      serviceAccountName: walle-account
      containers:
      - name: test-walle
        image: demo:1.0
        imagePullPolicy: IfNotPresent
        ports:
        - containerPort: 8081
部署V2版本的服务
vi test-walle-deploymentV2.yaml
apiVersion: apps/v1
kind: Deployment
metadata:
  name: test-walle-v2
  labels:
    app: test-walle
    version: v2
spec:
  replicas: 1
  selector:
    matchLabels:
      app: test-walle
      version: v2
  template:
    metadata:
      labels:
        app: test-walle
        version: v2
    spec:
      serviceAccountName: walle-account
      containers:
      - name: test-walle
        image: demo:2.0
        imagePullPolicy: IfNotPresent
        ports:
        - containerPort: 8081
部署gateway
vi test-walle-gateway.yaml
apiVersion: networking.istio.io/v1alpha3
kind: Gateway
metadata:
  name: qingfeng-deve
spec:
  selector:
    istio: ingressgateway # 使用 istio 默认的 ingress gateway
  servers:
  - port:
      number: 80
      name: http
      protocol: HTTP
    hosts:
    - "*"
部署DestinationRule
控制路由版本的呀
vi test-walle-destinationrule.yaml
apiVersion: networking.istio.io/v1alpha3
kind: DestinationRule
metadata:
  name: test-walle
spec:
  host: test-walle
  subsets:
  - name: v1
    labels:
      version: v1
  - name: v2
    labels:
      version: v2
部署VirtualService
都是50测试流量呀 配置test.ciwei.com hosts解析
vi test-walle-virtualservice.yaml
apiVersion: networking.istio.io/v1alpha3
kind: VirtualService
metadata:
  name: walle
  namespace: default
spec:
  gateways:
  - qingfeng-deve
  hosts:
  - test.ciwei.com
  http:
  - match:
    - uri:
        prefix: /
    route:
    - destination:
        host: test-walle
        subset: v1
      weight: 50
    - destination:
        host: test-walle
        subset: v2
      weight: 50
访问:test.ciwei.com 发现流量55开啦
部署全部yaml测试
部署
kubectl apply -f .修改VirtualService
控制v1流量10% v2流量90% 测试一下呀
vi test-walle-virtualservice.yaml
apiVersion: networking.istio.io/v1alpha3
kind: VirtualService
metadata:
  name: walle
  namespace: default
spec:
  gateways:
  - qingfeng-deve
  hosts:
  - test.ciwei.com
  http:
  - match:
    - uri:
        prefix: /
    route:
    - destination:
        host: test-walle
        subset: v1
      weight: 10
    - destination:
        host: test-walle
        subset: v2
      weight: 90
访问:test.ciwei.com
发现大部分流量都集中在v2版本
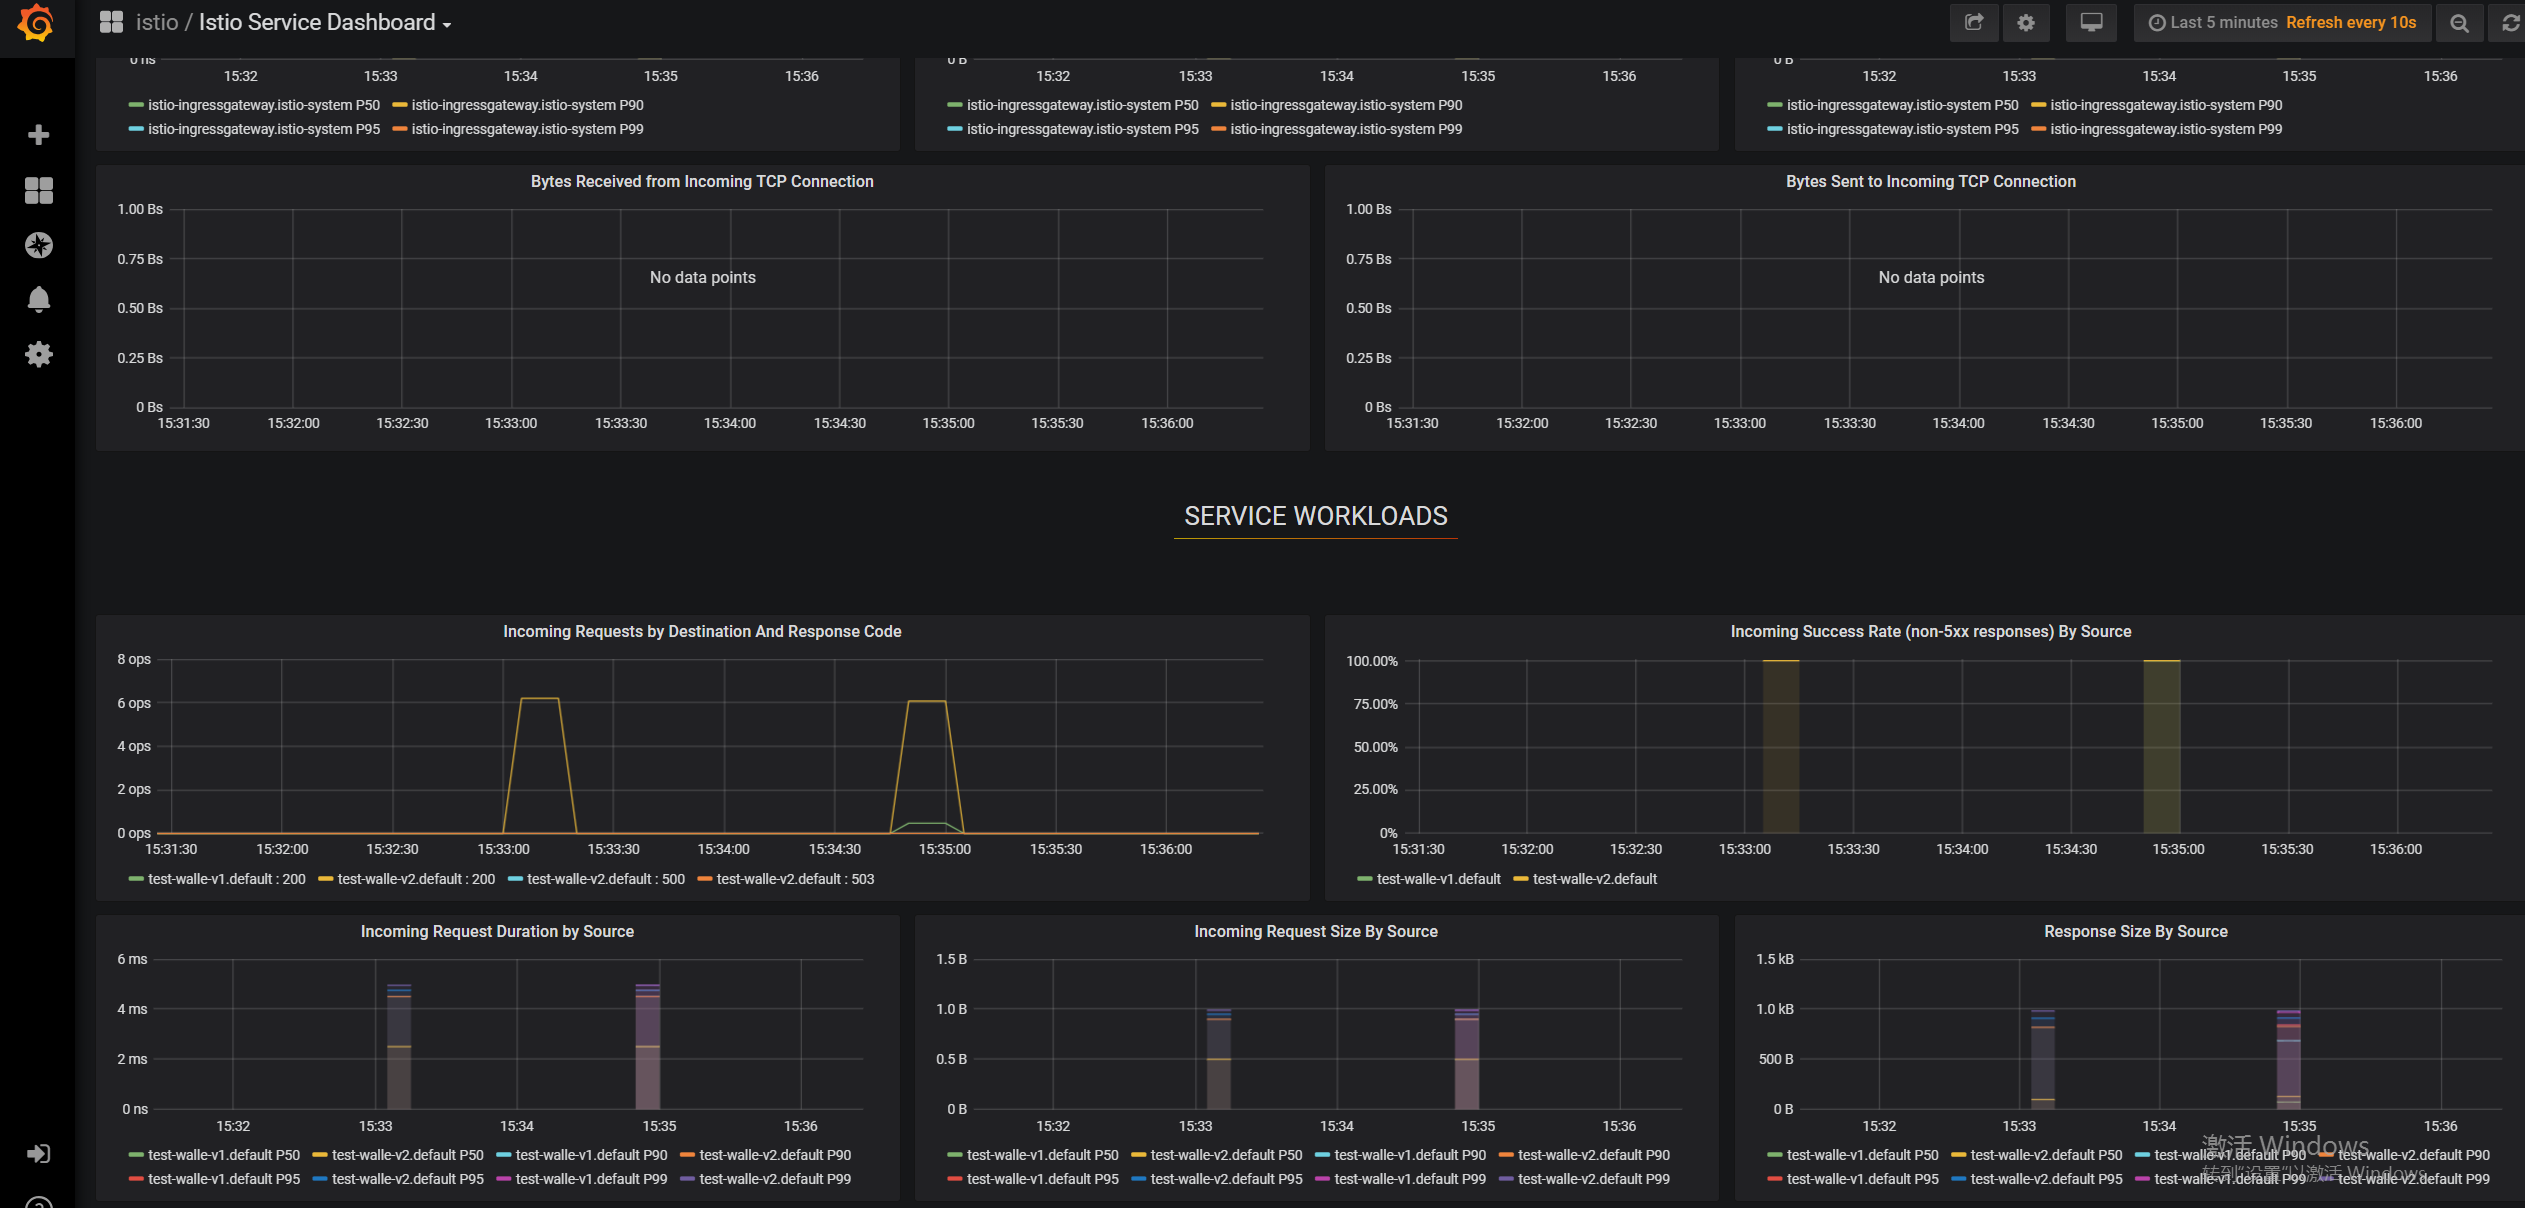
监控
前面文章讲过istio开启grafana暴露端口的 然后在界面查看demo2个版本的流量情况下 上面有200的请求和500的请求可以监控是否可以正常完成金丝雀部署